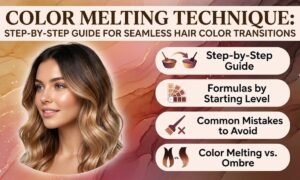
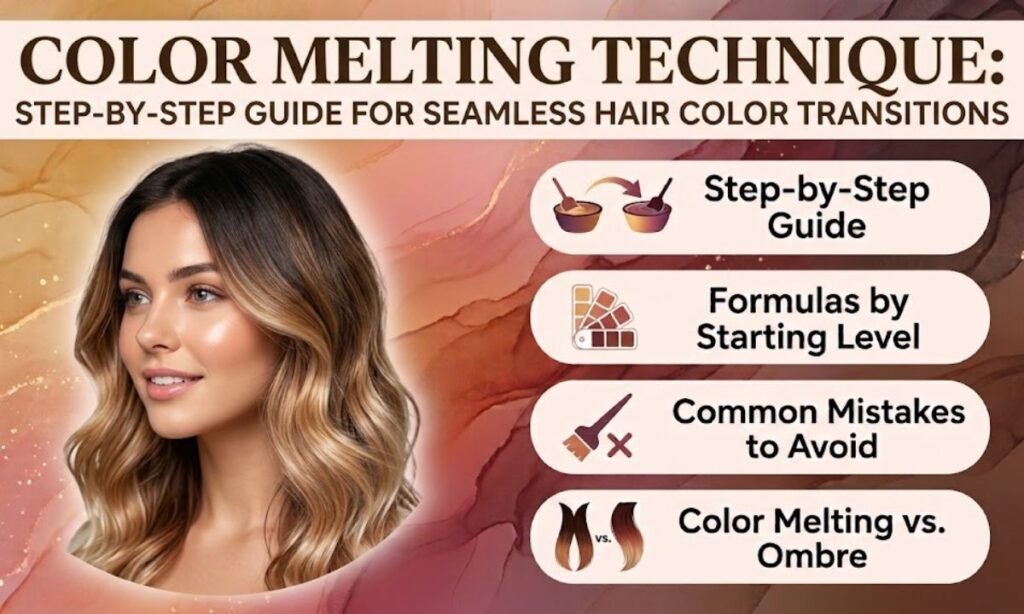
The color melting technique blends two or more shades into one smooth flow. There are no lines and no harsh steps between colors. The result looks soft, natural, and easy to grow out.
This guide covers the full color melting technique step by step. You will learn the formulas by starting level, the common mistakes, and how it compares to ombre. Every step is short and simple, so you can follow it in the salon.
A good color melting technique depends on three things: smart shade choice, clean blending, and a final toner. Get these right and the transition looks seamless from root to end.
What Is Color Melting and How Does It Work?
Color melting is a way to blend shades so they fade into each other. The colorist applies each color in its own zone, then softly merges the edges while the color is wet. The color melting technique works because the shades overlap at the transition, not because they sit in separate bands.
| Element | What it does |
| Root zone | Sets the depth and keeps regrowth soft |
| Mid zone | Acts as the bridge between root and end |
| End zone | Carries the lightest or brightest tone |
| Transition | Where the shades overlap and blend |
Pro Tip: Choose shades that are close in level. The smaller the jump, the smoother the melt.
Why It’s Still Trending in 2026-2027
Clients want color that looks natural and needs fewer salon visits. The color melting technique grows out softly, so there is no harsh regrowth line. It also works on every length, texture, and base color, which keeps it popular with colorists and clients alike.
| Reason | Why clients love it |
| Low maintenance | Visits every 3–4 months |
| Soft grow-out | No visible line at the roots |
| Flexible | Works for natural and fashion shades |
| Dimensional | Adds depth and movement |
How Does Color Melting Compare to Balayage, Ombre, and Babylights?
All four techniques add dimension, but they place color differently. The color melting technique focuses on blending two or more colors into one smooth gradient. The others focus on lightening, placement, or the pattern of the color.
| Technique | Method | Look | Maintenance |
| Color melting | Blends shades by overlapping zones | Smooth, seamless gradient | Low |
| Balayage | Hand-painted lightener | Natural, sun-kissed streaks | Low |
| Ombre | Dark roots to light ends | Clear, gradual contrast | Medium |
| Babylights | Very fine, delicate highlights | Soft, all-over brightness | Medium |
Pro Tip: Color melting can be combined with balayage or babylights. Use the highlights for brightness and the melt for smooth blending.
How Do You Apply Color Melting Step by Step?
The color melting technique follows eight clear steps. Work in clean sections and keep the product wet so the shades can blend.
Step 1: Diagnosis and Tone Selection
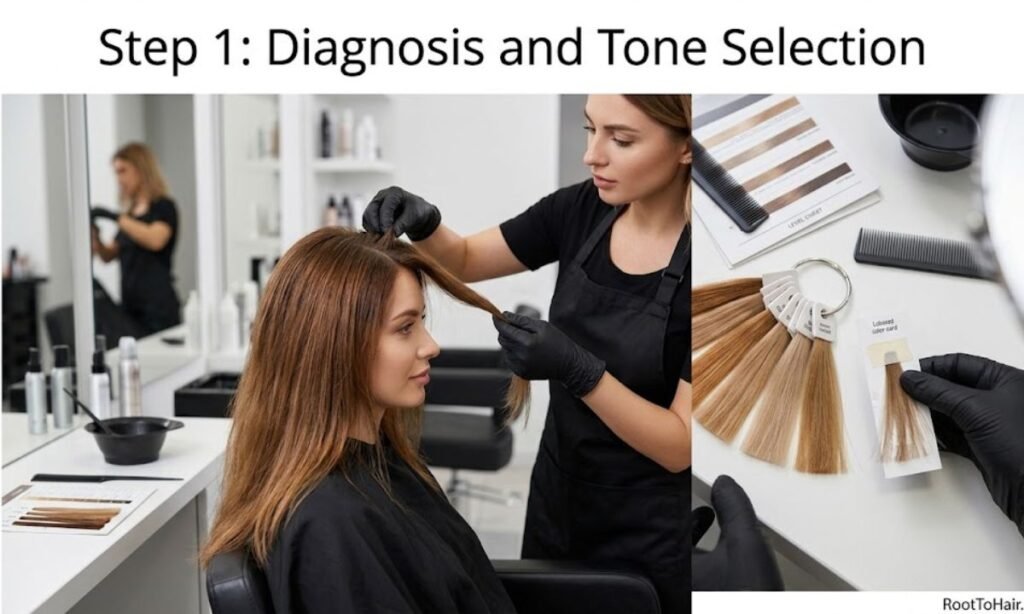
Check the natural level, the hair history, and the condition. Pick shades that sit close in level and share the same tone family. Do a strand test if the hair has been colored before.
Step 2: Hair Preparation
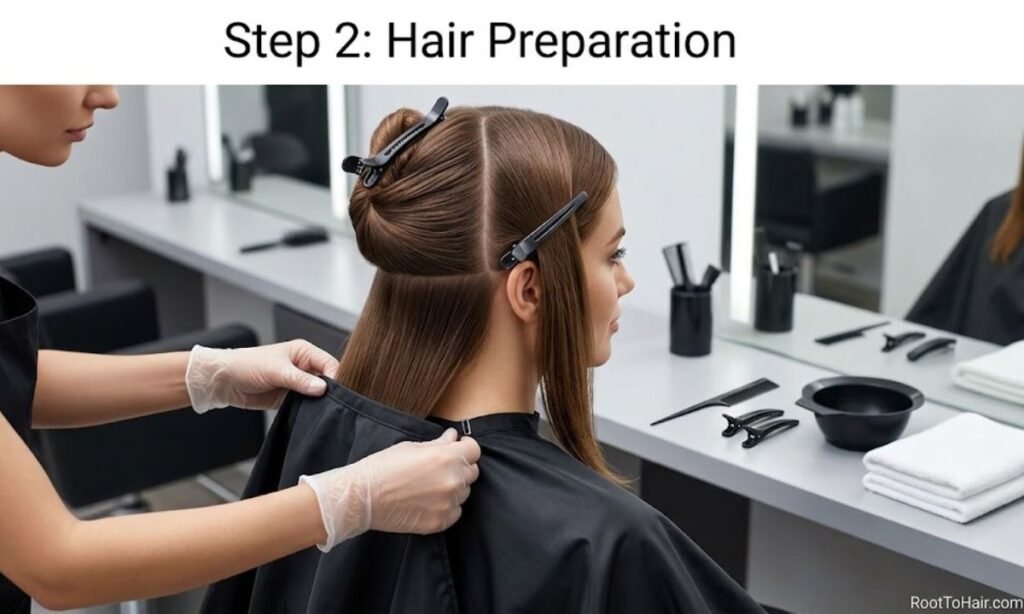
Section the hair into four parts, from ear to ear and from crown to nape. Use clean, dry or towel-dried hair depending on the product. Protect the skin and the client’s clothing.
Step 3: Root Tone Application
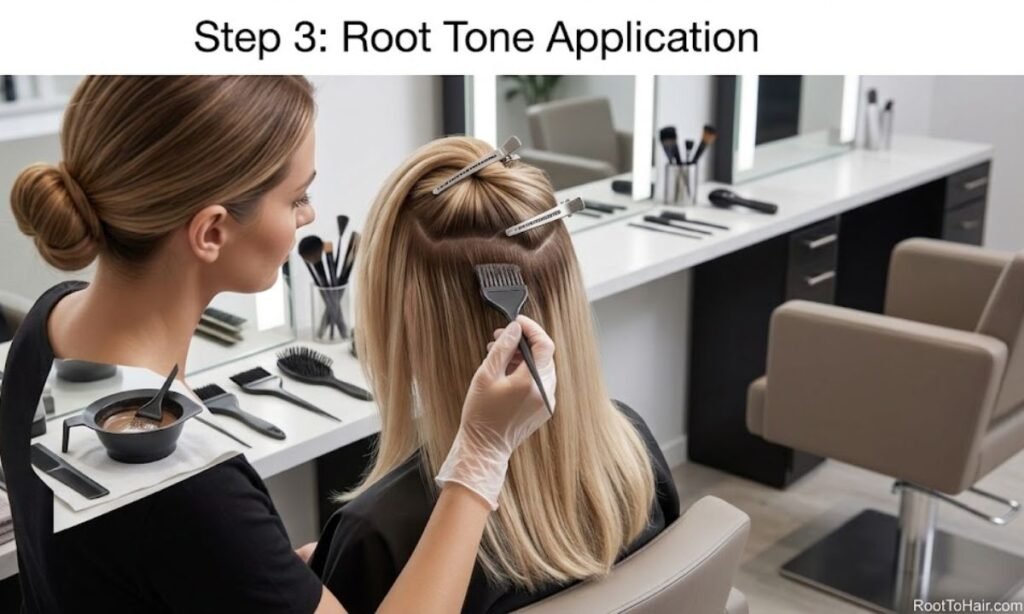
Apply the root shade first, starting at the base. Use a root smudge or a soft brush for a natural look. Keep the root color slightly deeper than the mids.
Step 4: Mid-Tone Application
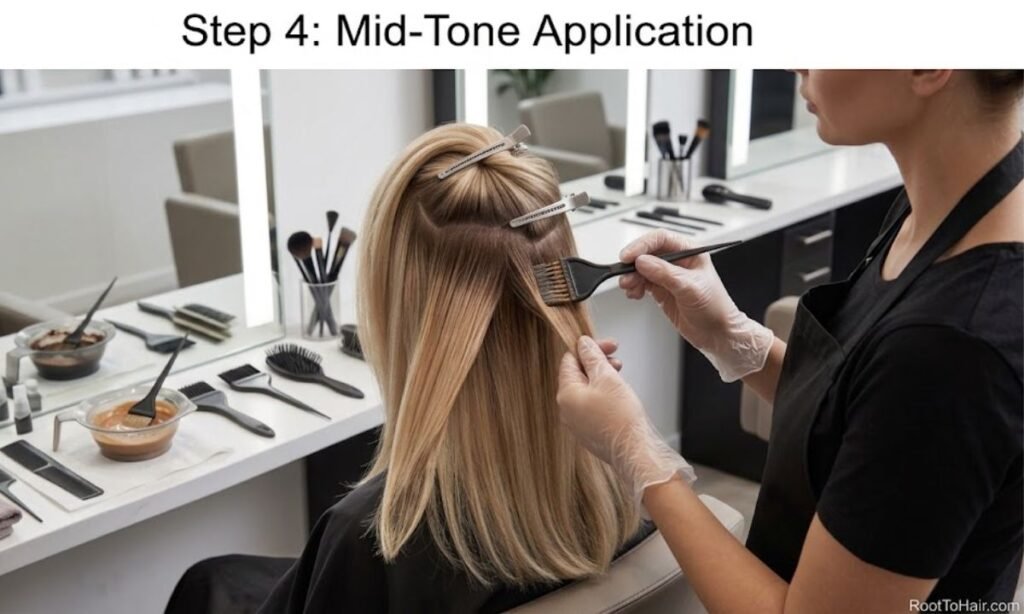
Apply the mid shade below the root zone. Overlap it a little into the root shade. This overlap creates the bridge for the melt.
Step 5: First Transition Blending
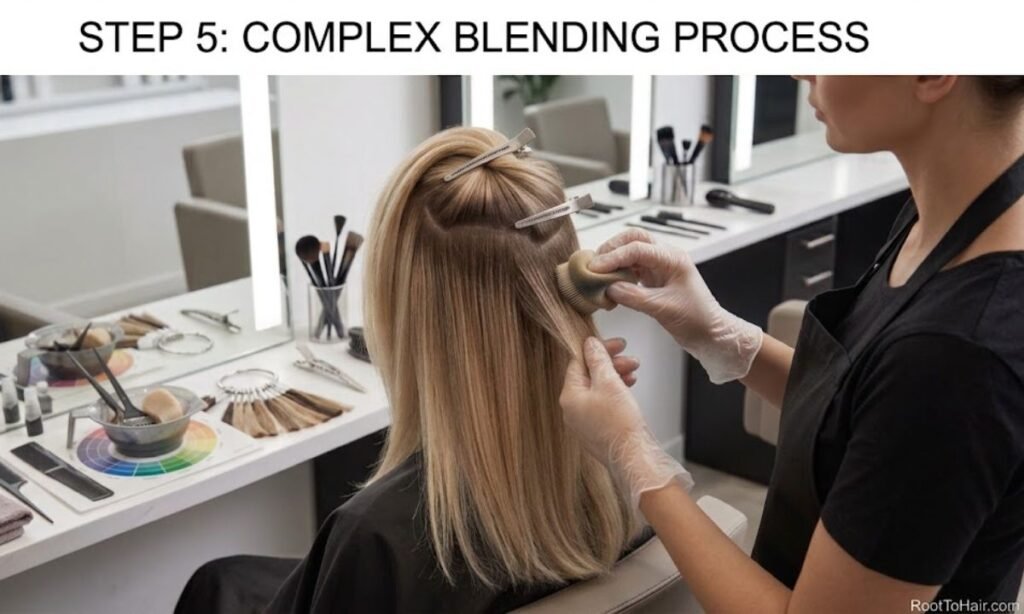
Use your fingers or a brush to feather the area where root and mid shades meet. Work in small, light strokes. Stop when there is no visible line.
Step 6: End Tone Application
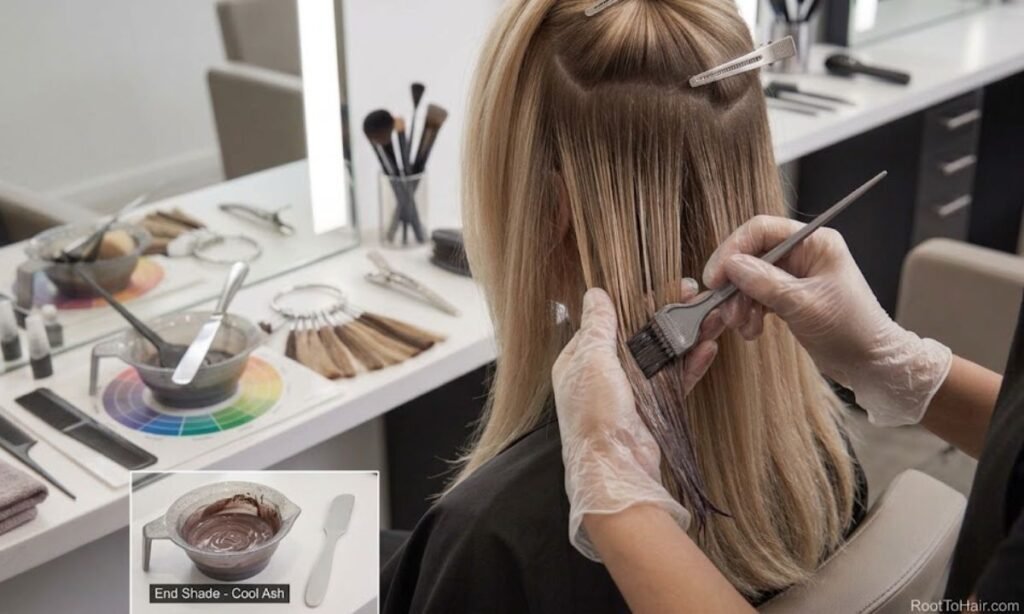
Apply the end shade to the lengths and ends. Saturate the ends well, because they absorb color differently. Keep the mid zone free of the end shade.
Step 7: Second Transition Blending

Blend where the mid shade meets the end shade. Use the same feathering motion. Check the section from the side to make sure the gradient looks smooth.
Step 8: Processing and Rinsing
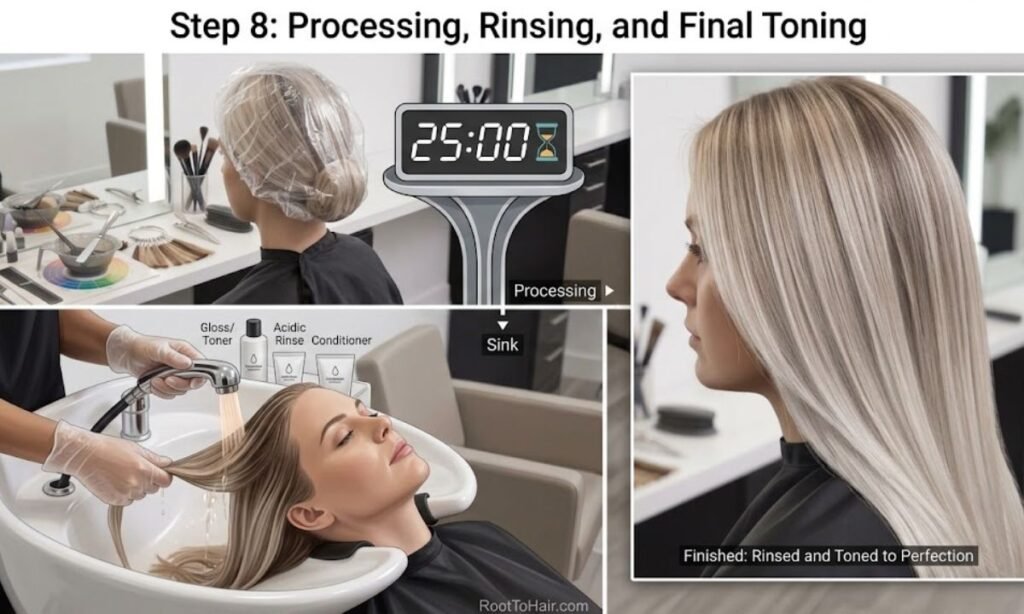
Let the color process for the time on the product. Rinse with lukewarm water, apply a gloss or toner if needed, and finish with an acidic rinse and a conditioner.
| Step | Key action | Common risk |
| 1–2 | Diagnose and prep | Wrong shade choice |
| 3–4 | Root and mid | Harsh root line |
| 5 | First blend | Under-blending |
| 6 | End tone | Uneven saturation |
| 7 | Second blend | Over-blending |
| 8 | Process and rinse | Over-processing |
Pro Tip: Work one thin section at a time. Thick sections hide gaps and make the blend uneven.
What Are the Color Melting Formulas by Starting Level?
Formulas depend on the starting level and the target. These examples use a generic level and tone system, so adjust them to your brand. Always stand the test first.
Color Melting on Dark Hair (Levels 3-5)
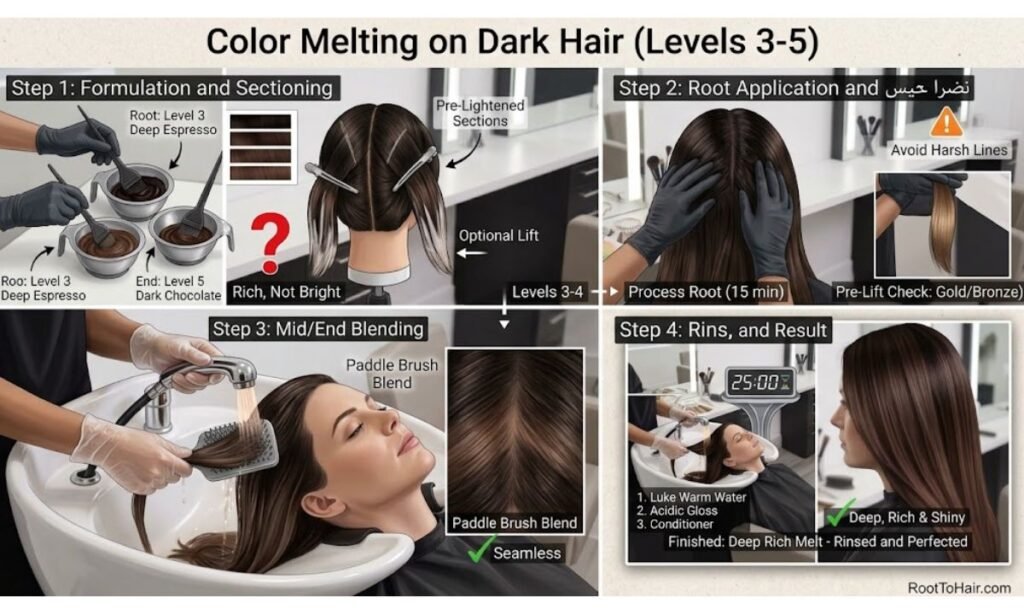
Dark hair holds a lot of pigment, so a deep, rich melt works best without heavy lift. For a lighter result, pre-lighten the mids and ends before melting.
| Zone | Example formula | Developer | Time |
| Root | 4/0 natural brown | 10–20 vol, 1:1 | 25–35 min |
| Mid | 5/3 light gold brown | 10–20 vol, 1:1 | 25–35 min |
| Ends (after lift) | 7/3 gold blonde | 10 vol, 1:1 | 20–30 min |
Pro Tip: On dark bases, lift in stages. Rushing the lift causes damage and orange tones.
Color Melting on Medium Hair (Levels 6-7)
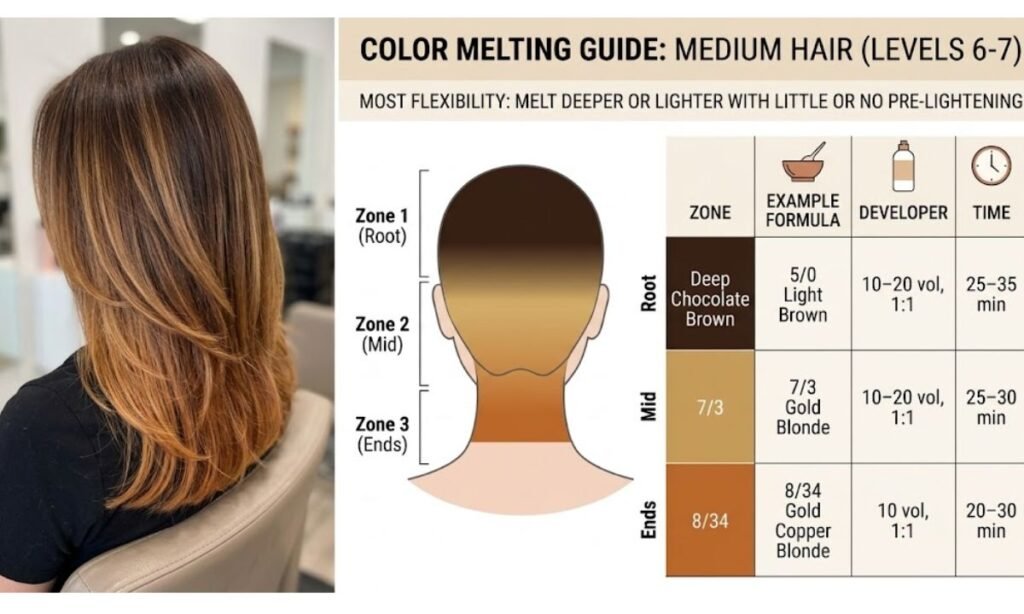
Medium hair gives you the most flexibility. You can melt toward deeper or lighter shades with little or no pre-lightening.
| Zone | Example formula | Developer | Time |
| Root | 5/0 light brown | 10–20 vol, 1:1 | 25–35 min |
| Mid | 7/3 gold blonde | 10–20 vol, 1:1 | 25–30 min |
| Ends | 8/34 gold copper blonde | 10 vol, 1:1 | 20–30 min |
Pro Tip: Keep the tone family consistent. A warm root with a cool end looks disconnected.
Color Melting on Light Hair (Levels 8-10)

Light hair is best for soft pastels or a deeper root melt. Because it is porous, it grabs color fast. Use a low developer and check often.
| Zone | Example formula | Developer | Time |
| Root | 7/1 ash blonde | 10 vol, 1:1 | 15–25 min |
| Mid | 8/1 light ash blonde | 10 vol, 1:1 | 15–20 min |
| Ends | 9/1 very light ash blonde | 5–10 vol, 1:1 | 10–20 min |
Pro Tip: Porous ends process quickly. Apply the end shade last and watch the timer.
What Are the Most Common Color Melting Mistakes?
Most color melting problems come from poor shade choice or weak blending. A few simple habits prevent nearly all of them.
Choosing Shades Too Far Apart in Tone or Level
If the shades are too different, the melt shows a clear jump. Stay within two or three levels and keep the tones in the same family.
| Mistake | Result | Fix |
| Big level gap | Visible step | Add a bridge shade |
| Mixed warm and cool | Muddy transition | Keep one tone family |
Blending Too Little or Too Much at the Transition
Too little blending leaves a line. Too much blending muddies both shades. Blend until the edge disappears, then stop.
| Mistake | Result | Fix |
| Under-blending | Hard line | Feather more |
| Over-blending | Dull, flat color | Blend lightly, then stop |
Skipping Toner and Aftercare
Without a toner, the color can look flat or brassy. Without aftercare, it fades fast. Finish with a gloss and give the client a clear home-care plan.
| Mistake | Result | Fix |
| No toner | Brassy or flat tone | Apply a gloss |
| No aftercare plan | Fast fading | Recommend color-safe products |
Pro Tip: Book a gloss refresh 6–8 weeks after the service to keep the melt looking fresh.
How Do You Use the Color Melt Technique on Hair?
The color melt technique is easy to follow when you break it into three phases: prepare, apply, and blend. Keep the same order every time for consistent results.
Prepping the Hair and Choosing Your Color Formulas
Check the hair’s condition and decide on two or three shades. Mix each formula separately and label the bowls. Prepare your brushes and sections before you begin.
| Prep item | Why it matters |
| Strand test | Confirms the result and timing |
| Labeled bowls | Prevents mixing errors |
| Clean sections | Gives even application |
Applying the Root, Mid-Lengths and Ends Step by Step
Start with the root, move to the mids, and finish with the ends. Overlap each zone slightly into the next. Keep every section wet and evenly saturated.
| Zone | Application tip |
| Root | Soft smudge, no harsh line |
| Mid-lengths | Overlap into the root zone |
| Ends | Fully saturate, apply last |
Blending the Transitions for a Seamless Finish
Feather the edges with your fingers or a soft brush. Use light, quick strokes. Check each section in natural light before you rinse.
| Blending tool | Best use |
| Fingers | Soft, natural feathering |
| Soft brush | Clean, controlled blending |
| Comb | Final smoothing of the section |
Pro Tip: Step back and look at the whole head before rinsing. A small touch-up is easier while the color is still wet.
What Is the Difference Between Color Melting and Ombre?
Color melting and ombre both create a gradient, but they do it differently. Ombre has a clear shift from dark to light. Color melting blends several shades into a softer, more flexible flow.
How Each Technique Handles the Transition
Ombre moves in one direction, usually dark at the root and light at the ends. Color melting overlaps shades so the change is gentle and can include more than two colors.
| Technique | Transition style |
| Ombre | Single, clear gradient |
| Color melting | Soft, layered, multi-tone blend |
Color Placement and Overall Look Compared
Ombre keeps the roots dark and the ends light. Color melting can place shades anywhere, such as a root melt, a mid-length melt, or a fashion-color melt.
| Technique | Placement | Look |
| Ombre | Dark top, light bottom | Bold contrast |
| Color melting | Flexible zones | Smooth, natural, custom |
Maintenance and Grow-Out: Which Lasts Longer?
Both are low maintenance, but color melting usually grows out softer. A root melt hides regrowth, while ombre can show a line when the dark section grows out.
| Technique | Salon visits | Grow-out |
| Ombre | Every 3–4 months | Moderate |
| Color melting | Every 3–5 months | Very soft |
Pro Tip: If the client wants minimum upkeep, recommend a root melt with a close-to-natural base shade.
Can I Use Color Melting on Short Hair?
Yes. The color melting technique works on short hair, but it needs smaller zones and closer shade choices. The transitions are tighter, so careful blending matters even more.
Which Short Cuts Work Best for a Color Melt
Bobs, lobs, pixie cuts with length on top, and layered shags all work well. Cuts with some texture and movement show the melt best.
| Cut | Why it works |
| Bob | Clear zones for a smooth gradient |
| Lob | Extra length for a fuller melt |
| Layered shag | Texture shows the blend |
| Long pixie | Top length carries the color |
Adjusting Placement and Shade Choice for Short Lengths
Use fewer shades, often two or three. Keep the transition zone small and use shades that sit close in level. Place the lighter shade around the ends and face for brightness.
| Adjustment | Reason |
| Two or three shades | Avoids a busy look |
| Smaller zones | Fits the shorter length |
| Closer levels | Keeps the blend smooth |
Tips for Blending Seamlessly on Shorter Hair
Work in thin sections and use a fine brush. Blend with small strokes and check the result from several angles. Short hair shows mistakes quickly, so go slowly.
| Tip | Benefit |
| Fine brush | Precise placement |
| Thin sections | Even blending |
| Check all angles | Catches harsh lines |
Pro Tip: On short hair, leave a little more regrowth room at the root so the grow-out stays soft.
Frequently Asked Questions
What is color melting for hair?
Color melting is a coloring method that blends two or more shades together so they flow into each other. The colorist overlaps the zones and feathers the edges, which removes any visible line. The result is a smooth, natural-looking gradient from root to ends.
What is the difference between color melting and balayage?
Balayage hand-paints lightener in soft streaks to brighten the hair. Color melting blends shades together for a smooth gradient and can use lightener or color. Balayage is about highlights, while color melting is about seamless blending between tones.
How long does a color melt last?
The base color usually lasts 3 to 5 months because the grow-out is soft. The toner fades sooner, often in 6 to 8 weeks. A gloss refresh and color-safe home care keep the melt looking fresh for longer.
How much does a color melt cost?
The price depends on the salon, hair length, thickness, and how much lightening is needed. Many salons charge from about $150 to $400 or more. Ask for a consultation first, because the number of shades and the time needed change the final cost.
Can you do color melting at home?
It is possible but difficult. Home color melting needs careful shade choice, clean sectioning, and fast, even blending. Mistakes can cause harsh lines or uneven color. For dark hair or a big color change, it is safer to see a professional colorist.
Conclusions
The color melting technique gives you a smooth, natural gradient that grows out softly. With the right shades, careful blending, and a final toner, it works on short or long hair and on any base level. Following the eight steps keeps the result consistent every time.
To get the best color melting technique result, choose shades that sit close together, blend until the line disappears, and protect the color with good aftercare. Use the formulas and tips in this guide and your next melt will look seamless from root to end.