
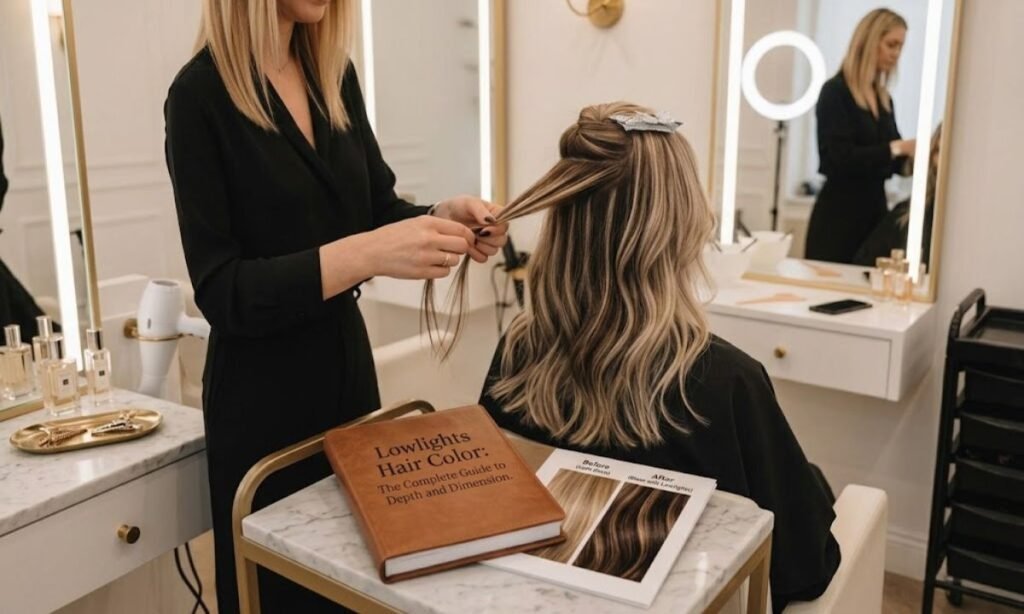
Lowlights hair color adds darker strands to your natural shade.
It makes flat hair look rich and full.
You get soft depth without a big change.
Many people love lowlights hair color after too many highlights.
The darker tones bring back a natural look.
Your hair also looks thicker and shinier.
This guide keeps things simple and easy to follow.
You will learn how to choose, apply, and style lowlights hair color.
You will also see mistakes to avoid.
What Are Lowlights and Why Do They Work?
Lowlights hair color means adding strands darker than your base or highlights.
The darker tone creates shadow, and shadow makes lighter areas stand out.
That contrast is why hair looks thicker and more dimensional.
Characteristic Results
Lowlights hair color gives hair visible depth, soft contrast, and a fuller look. The effect is subtle and grows out gently.
| Factor | Result |
| Depth | Richer, deeper overall tone |
| Dimension | Light and dark strands read as layers |
| Movement | Hair looks fuller when it moves |
| Grow-out | Soft blend with no harsh root line |
Pro Tip: Bring two photos of lowlights you like and one you dislike. Your colorist can then match the contrast level you actually want.
When to Choose Lowlights
Choose lowlights hair color when your hair looks flat, over-lightened, or one-toned. It also suits anyone who wants a fresh change without going lighter.
| Situation | Objective |
| Over-highlighted hair | Restore natural depth |
| Flat, single-tone color | Add dimension |
| Growing out highlights | Soften the transition |
| Hair that looks thin | Create the look of more volume |
Pro Tip: If you are unsure, start with fine lowlights under the top layer. It is easier to add more next visit than to fix a heavy first round.
How to Apply Lowlights Step by Step?
Applying lowlights hair color is a simple process when you follow the right order.
Each step affects how natural the final result looks.
Skipping one can lead to patchy or overly dark strands.
Step 1: Evaluation and Consultation
Every lowlights hair color service starts with a clear look at your natural level, tone, and hair health. These details shape every choice that follows.
| Factor | What to Check | Why It Matters |
| Natural level | Depth of your base color | Sets how dark to go |
| Existing color | Past dye and lifted ends | Avoids uneven results |
| Undertone | Warm, cool, or neutral | Guides the lowlight tone |
| Hair health | Dryness and breakage | Decides formula strength |
Pro Tip: Mention any box dye or henna from the past year. These products can change how lowlights hair color takes.
Step 2: Product Preparation
Product preparation means choosing a shade, a formula, and a developer strength. Most lowlights hair color uses demi-permanent or permanent color with low developer.
| Factor | Typical Choice |
| Shade depth | 1 to 3 levels darker than the base |
| Color type | Demi-permanent or permanent |
| Developer | Low volume, often 10 to 20 vol |
| Tools | Foils, brush, sectioning clips |
Pro Tip: Use the same brand line for color and developer. Their mixing ratios are designed to work together.
Step 3: Strategic Placement Pattern
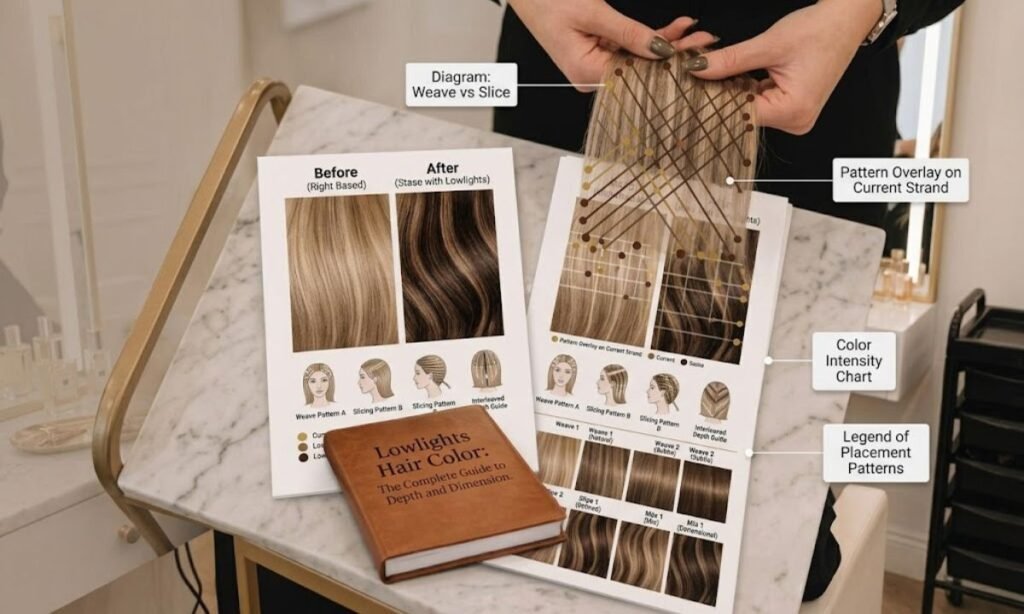
Placement decides whether lowlights hair color looks natural or striped. Most colorists start with the underlayers and the crown.
| Zone | Density | Objective |
| Underlayers | Medium | Build depth without visible lines |
| Crown | Light | Add soft shadow |
| Face frame | Very light | Keep brightness near the skin |
| Nape and ends | Medium | Add weight and richness |
Pro Tip: Ask for an irregular, zigzag parting when sectioning. It keeps the pattern from repeating in neat, obvious lines.
Step 4: Application Technique
Technique controls how sharp or soft lowlights hair color looks. Fine weaving in foils gives the most precise control.
| Technique | Best For | Result |
| Foil weave | Precise placement | Defined dimension |
| Freehand painting | Soft blending | Natural, gradual look |
| Slicing | Thicker sections | Bolder contrast |
Pro Tip: Take thin, even sections and saturate each strand fully. Uneven saturation is the main cause of patchy tone.
Step 5: Processing Time
Processing time depends on your formula, hair type, and shade change. Lowlights hair color needs regular checks so it does not go too dark.
| Hair Type | Typical Time | Note |
| Fine or porous | 15 to 25 minutes | Takes color quickly |
| Medium | 25 to 35 minutes | Follow product timing |
| Coarse or resistant | 35 to 45 minutes | Check every 10 minutes |
Pro Tip: Wipe one strand with a towel at the halfway mark to check the shade. Porous ends grab pigment faster than most people expect.
Step 6: Rinse and Finish
Rinse with lukewarm water until it runs clear, then cleanse gently. A proper finish helps lowlights hair color settle and stay shiny.
| Step | Action | Purpose |
| Rinse | Lukewarm water | Removes leftover product |
| Cleanse | Color-safe shampoo | Protects fresh pigment |
| Gloss | Optional toner or gloss | Refines tone and shine |
| Condition | Deep or bond-building mask | Restores softness |
Pro Tip: Wait at least 48 hours before your first wash at home. This gives the color time to settle.
How to Formulate Lowlights by Level and Objective?
Formulating lowlights hair color means matching shade depth and tone to your starting level.
A formula that works on a level 8 blonde will look very different on a level 10.
Your goal decides how far down you go.
For Natural Blondes (Level 7-8) Who Want Dimension
Natural blondes at level 7-8 can use lowlights hair color to add warmth and shape without going too dark. Aim for a soft step down.
| Goal | Lowlight Level | Suggested Tone |
| Soft depth | Level 6 | Golden beige |
| Bold contrast | Level 5 | Neutral brown |
| Sun-kissed look | Level 6 | Honey |
Pro Tip: Add a touch of gold or beige to the formula. Very ash shades can look dull on light natural hair.
For Bleached Blondes (Level 9-10) Who Look Flat
Bleached hair at level 9-10 often looks flat and chalky. Lowlights hair color brings back dimension, but the hair usually needs a fill first.
| Common Problem | Solution |
| Flat, one-tone look | Lowlights at level 7 to 8 |
| Porous strands | Pre-fill with a warm base shade |
| Yellow tone | Beige or ash-beige lowlights |
Pro Tip: Choose a demi-permanent color over permanent bleached hair. It is gentler and fades gradually instead of turning muddy.
To Disguise Early Grays in Brunettes
Lowlights hair color can blend early grays into brown hair without a solid dye job. Fine strands make silver look like a planned dimension.
| Situation | Lowlight Shade | Density |
| Scattered grays | Close to base level | Fine and close together |
| Grays at the hairline | Base level, applied lightly | Light |
| Dense gray patches | Use gray coverage first | Add lowlights after |
Pro Tip: Add a gloss between appointments. It keeps the blended grays looking consistent as the color fades.
Lowlights in Warm vs Cool Tones
Lowlights hair color looks best when the tone matches your skin undertone. Warm and cool shades create very different effects.
| Undertone | How to Identify | Lowlight Colors That Flatter |
| Warm | Greenish veins, gold jewelry flatters | Caramel, chestnut, copper brown |
| Cool | Blue or purple veins, silver flatters | Ash brown, cool beige, mocha |
| Neutral | A mix of both | Neutral brown, soft beige |
Pro Tip: Hold a few swatches near your face in daylight. Indoor lighting can hide how a tone really looks on you.
Lowlights vs Highlights: When to Use Each?
Highlights lighten strands, while lowlights hair color darkens them.
Each one changes how light reflects across your hair.
Choose based on whether your hair needs brightness or depth.
The Perfect Combination: Highlights + Lowlights
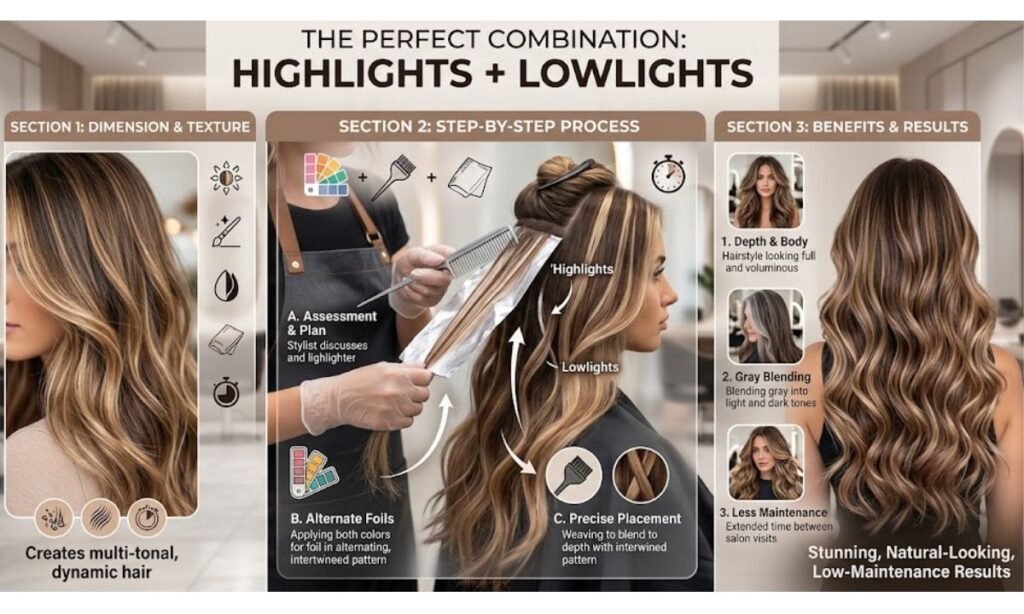
Pairing highlights with lowlights hair color creates balanced, multi-tonal hair. Light strands add shine while dark strands add depth.
| Factor | Highlights | Lowlights |
| Effect | Brightens and lifts | Adds depth and shadow |
| Placement | Top layers and face frame | Underlayers and lower sections |
| Result | Shine and glow | Fullness and richness |
Pro Tip: Use more highlights than lowlights if your base is dark. Reverse that ratio if your base is light.
What Are the Best Combinations with Lowlights?
Lowlights hair color works well with many popular techniques.
It adds depth to styles that can otherwise look too light or too flat.
The right pairing depends on your base color and maintenance goals.
Balayage + Lowlights
Balayage with lowlights hair color gives a sun-kissed look with grounded depth. The lowlights stop the lighter areas from looking washed out.
| Zone | Technique | Objective |
| Roots | Soft root smudge | Blend into natural color |
| Mid-lengths | Hand-painted balayage | Add sun-kissed lift |
| Underneath | Fine lowlights | Keep depth and contrast |
Pro Tip: Ask your colorist to tone the balayage first, then add lowlights. This shows the true base before choosing the shade.
Babylights + Lowlights
Babylights create fine, soft light strands, and lowlights hair color adds a subtle shadow between them. Together they look natural and blended.
| Element | Technique | Result |
| Babylights | Ultra-fine light strands | Soft, natural glow |
| Lowlights | Fine strands, 1 to 2 levels darker | Gentle depth |
| Spacing | Close and even | Seamless blend |
Pro Tip: Keep the lowlight strands as thin as the babylights. Thicker strands can break the soft, blended effect.
Gray Coverage + Lowlights

Combining gray coverage with lowlights hair color gives full coverage and added dimension. It stops solid color from looking flat.
| Situation | Solution |
| Under 30% gray | Fine lowlights alone may blend it |
| 30% to 70% gray | Gray coverage base, then lowlights |
| Over 70% gray | Full coverage base with depth strands |
Pro Tip: Pick lowlights one level darker than your coverage base. This keeps the contrast visible without looking heavy.
What Are the Most Common Lowlight Mistakes and How to Avoid Them?
Most problems with lowlights hair color come from shade, placement, or hair condition.
Knowing them before your appointment saves time and money.
Each mistake below has a simple fix.
1. Lowlights Too Dark
Going too dark is the most common lowlight hair color mistake. Strands stand out as stripes instead of blending.
| Common Mistake | Consequence | Solution |
| Going 3+ levels darker | Heavy, striped look | Stay 1 to 2 levels darker |
| Very dark brown on light hair | Harsh contrast | Choose a softer, warmer brown |
Pro Tip: If the result feels too dark, ask about a gloss or gentle clarifying wash before lightening again.
2. Concentrating in Visible Zones
Placing too much lowlights hair color around the part or face makes the pattern obvious. Balance matters more than quantity.
| Common Mistake | Consequence | Solution |
| Heavy color at the part | Obvious stripes | Place most strands underneath |
| Only around the face | Uneven, patchy look | Spread across all layers |
Pro Tip: Ask your colorist to check the pattern from the back and both sides before rinsing.
3. Not Considering Porosity
Porous hair absorbs lowlights hair color faster and darker. Ignoring this leads to uneven tone.
| Common Mistake | Consequence | Solution |
| Same formula on porous ends | Dark, patchy tone | Use a lighter shade or shorter time |
| Ignoring low-porosity hair | Weak, faded color | Allow slightly longer processing |
Pro Tip: Spray a small section with water before your appointment. If it soaks in quickly, tell your colorist your hair is porous.
4. Lowlights to the Ends on Damaged Hair
Damaged ends soak up color unevenly, so lowlights hair color can look muddy there. Stopping short protects fragile lengths.
| Common Mistake | Consequence | Solution |
| Color on brittle ends | Dryness and breakage | Stop lowlights before the last inch |
| Skipping a trim | Uneven absorption | Trim damaged ends first |
Pro Tip: Book a trim before your lowlights hair color appointment. Your colorist will work on healthier ends.
5. Not Alternating with Clean Sections
Coloring every strand removes the natural contrast that makes lowlights hair color work. Leaving clean sections keeps the look dimensional.
| Common Mistake | Consequence | Solution |
| Every strand colored | Flat, solid look | Leave natural sections between |
| Sections too close together | Heavy, blocky effect | Weave every second or third section |
Pro Tip: Ask for slightly wider clean sections at the crown, where color shows most.
Frequently Asked Questions
What are lowlights in hair color?
Lowlights are darker strands added to lighter hair for depth and dimension.
Can I get lowlights hair color on blonde hair?
Yes, lowlights hair color works well on blonde hair to add depth and reduce flatness.
How often should I redo lowlights?
Most people refresh lowlights every 8 to 12 weeks, depending on how fast their hair grows.
Do lowlights damage hair?
Lowlights are usually gentler than bleach because they add color instead of lifting it.
Do lowlights cover gray hair?
Lowlights hair color can blend early grays, but heavy gray needs a coverage base.
How Long Do Lowlights Last?
Lowlights hair color usually looks fresh for 8 to 12 weeks before it needs a refresh.
Do Lowlights Damage Hair?
Lowlights are usually gentler than bleach because they add color instead of lifting it.
Can You Do Lowlights on Dyed Hair?
Yes, lowlights hair color works on dyed hair if the hair is healthy and the shade is chosen carefully.
Lowlights or Full Color to Disguise Grays?
Lowlights blend early grays softly, but full color is better for heavy gray coverage.
Conclusion
Lowlights hair color adds depth, contrast, and a fuller look.
Results depend on your base level, shade choice, and placement.
Steps like consultation and processing checks keep the color even.
Before your appointment, know your hair level and preferred tone.
Avoid going too dark and leave clean sections between strands.
With the right plan, lowlights hair color gives natural, lasting dimension.





















1 thought on “Lowlights Hair Color: The Complete Guide to Depth and Dimension”